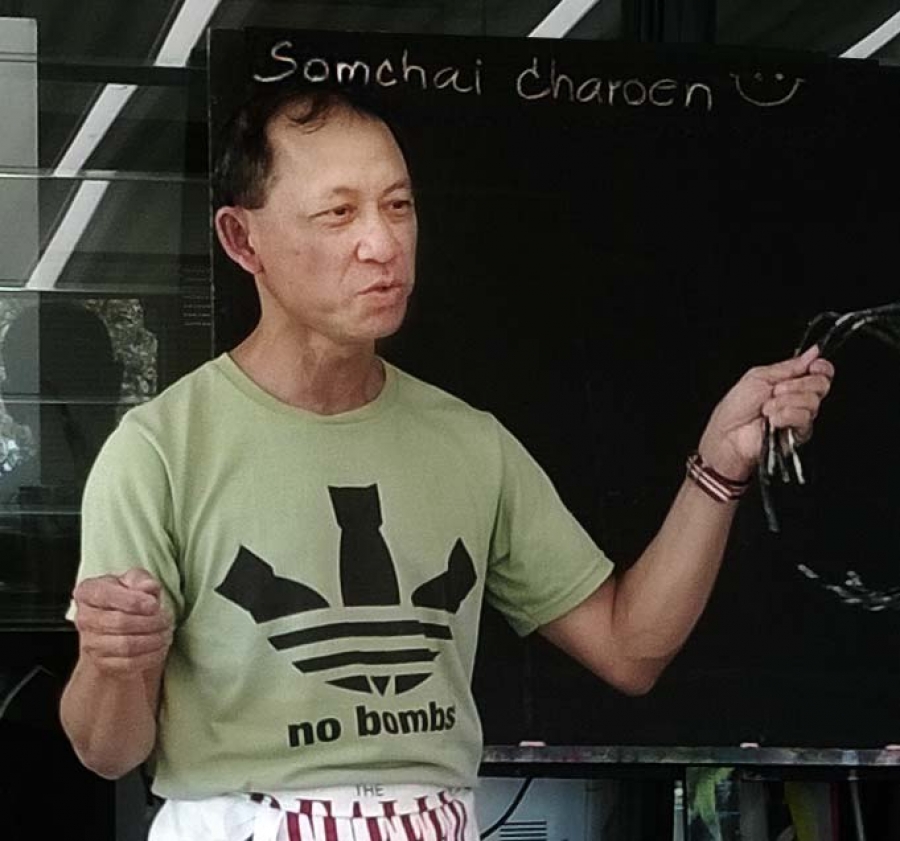
Somchai Charoen is a Thai born ceramic artist based in Sydney who has exhibited both nationally and internationally. Trained in industrial ceramic design, he was a former lecture at Silpakorn University, Thailand. Since migrating to Australia in 2001, he has worked commercially as a mould and model maker as well as establishing his ceramic homewares label Eat Clay.
Somchai has been working with many artists, designers and ceramics companies including Ben Quilty, Hany Armanious, Rod Bamford, Trent Jansen Mud Australia and Bison Australia. He is a co-founder of Belmore ITCH, a residency for non-ceramic artist to explore and interpret the medium.
“What I teach today hopefully will be useful,” Somchai said in his opening remarks.
“Sometimes making a mould can be fraught with unexpected consequences”, he said. “When bad things happen, like a mould sticks or plaster runs out all over the floor, I go away and have a coffee or tea and come back later!” He hoped that there would be no calamities during the day but assured us that if there were we would learn from them.
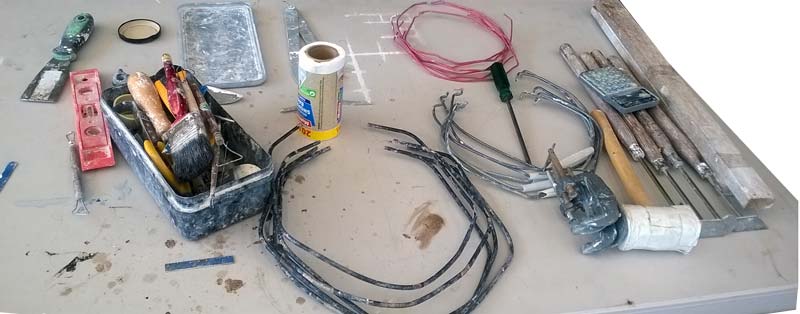
Somchai took us through his tools-of-trade and their various uses. Most of his tools he has had for over ten years and many are ‘found objects’ given a new life, like the metal handles of buckets and similar sprung metal rods that he uses as clamps.
Off-cuts of wooden boards, very strong, are useful for improvised cottle boards to construct the reservoirs to contain the plaster, held together with the wire clamps, pegs, or string. Instead of buying expensive “Soft Soap”, which you use straight as it comes, he uses Sunlight laundry soap, grated into warm water and frothed. This is the medium to prevent plaster sticking to plaster, and helps to resist the bonding of plaster to other absorbent materials, like wood. Additives to this mix might be food colouring (to show where the soap has been brushed), and cooking oil to help brushing fluidity, in the ratio of 1 cup to 2 L of soapy water.
The mixture should be the consistency of pouring cream and 3 coats are applied to the master and other surfaces. Somchai mixes a large quantity and stores it indefinitely, adding more water or oil as needed.
The plaster Somchai uses is “Potters Plaster” from CSR, and an American plaster from Barnes Products – http://www.barnes.com.au/ which is white and fine but expensive.
This product is similar to Dental plaster and he buys it “only when on sale!” Plaster has a use-by date of around six months. Somchai advised to “keep an opened bag in a plastic bag and store off the floor”. Plaster absorbs water from the atmosphere and can “go off” over time, meaning it won’t set when you add it to water.
He advised the necessity of keeping plaster separate from the potting area of our studios, as plaster pieces mixed in clay will cause inevitable damage after a work is fired. The plaster chip expands after absorbing moisture and pops a piece of clay from the surface. He uses two wheels, one for clay and one for plaster.
Taking Care is Vital
“Safety”, Somchai stressed, “is very important.”
He mixes up to 5 tons of plaster a year and has an annual lung check. “Don’t use cheap masks”, Somchai added, and “wear rubber gloves because if you are mixing plaster all day your hands get dry and it saves having to wash all the time.”
Plaster Preparation:
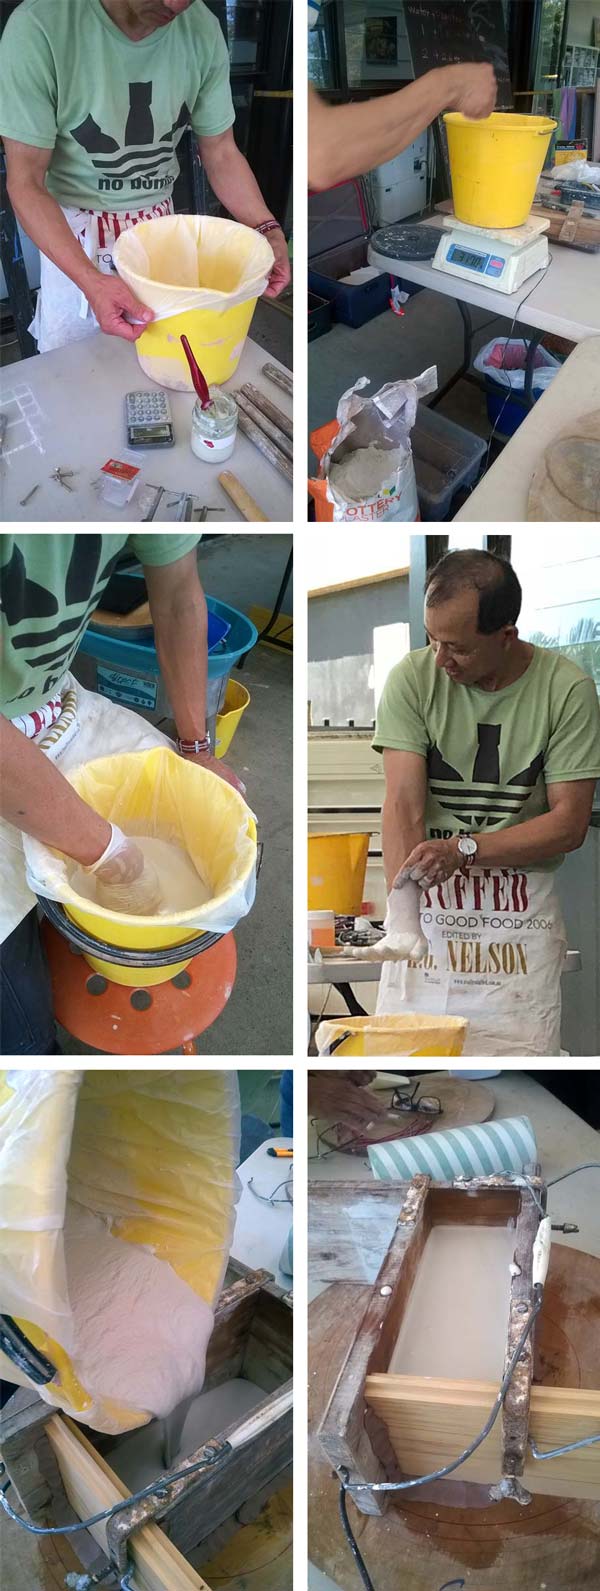
Somchai lined a clean, damp bucket with a bin liner (which saves having to clean the bucket). He calculated exactly how much plaster was needed from the dimensions of the set-up. “If you are making a one piece mould, you can add the plaster to the estimated volume of water until you see a large “island” of plaster sitting above the water.
But for two piece moulds, you have to be more exacting in your measurements of the raw materials, because you want the porosity/hardness of the plaster to be the same for all pieces of the mould”.
Somchai’s first task was to make a rectangular ‘master’ measuring 10x10x25cm. A 2-piece mould would be made from this. “It is advisable”, he said, “to allow a plaster master to dry completely before moulding from it, as bubbles may occur. However it is not possible to do that today.”
When making moulds for slip casting he uses the ratio of 1 litre of water to 1.3kg of plaster, making 1.5 litres of mixture. It was agreed that all the plaster mixed this day would follow this recipe, whether it was for a master, a one, or a 2 piece mould.
“So for the ‘master’ we are making today measuring 10 x 10 x 25=2500=2.5 litres, we need 2 litres of water and 2.6kg of plaster”. From past experience he allows a little more which “is better than not enough!” He recommended using kitchen scales with a flat surface that weigh up to ten kilos.
The water was measured and added to the bucket. The plaster weighed and added handful by handful to the water. To mix the plaster, Somchai placed his hand flat on the bottom of the bucket and slowly agitated to allow the bubbles to come to the surface.
He then scooped the bubbles from the surface into a waste container and continued slowly stirring. Depending on the setting rate of the plaster there may be a lot of stirring or waiting required.
“The plaster is ready when it is creamy. A way to test this is to run your fingers across the surface and if the mark stays it is ready to pour. If you want to delay the setting time, perhaps because you have a large mould, you can add 3% vinegar. This gives you more time to play”, he said.
Vinegar adds strength. Also adding 5-10% quick-set cement makes stronger plaster. (The plaster from Barnes is a strong plaster.) Conversely, if you want plaster to set faster, add 3% salt, or Ammonium hydroxide.
Pouring
Before pouring the plaster Somchai ensured that the set-up was as leak proof as possible by filling any cracks with coils of clay. The advantage of waiting until the plaster is almost set before pouring minimises the quantity of spread if the walls break or open up.
“If this happens”, he says, “and it’s sure to at some time, leave the spill to set, and have a cuppa. It’s easier to clean up set plaster than the runny version!”
If you are a bit short on the quantity, you can spray the plaster already poured with water, keeping it saturated, while making up the remaining plaster, and the two lots will join and set the same size.
While the rectangular master set Somchai prepared to make a mould from a ‘found object’ – a tube of cardboard. The ends were neatly sealed with fine white clay and the cardboard coated with Vaseline.
He sat the tube on end and using a pair of dividers marked the tube with intersecting arcs to establish the centre-line of the tube, and drew a line along opposite sides of the tube. In setting the tube horizontally he said, “Make sure your table is level; if necessary use a spirit level”.
Somchai placed ruler-wide strips of foam board, (easy to cut and has a very smooth surface) along the side lines on the tube, supported by lumps of clay, (red strips in diagram). The surrounding reservoir was made of wooden boards clamped together with springy wire (bucket handles) and positioned to seal the cylinder and side strips such that the first pour of plaster covered the top half of the cylinder only.
Just before the plaster pour Somchai positioned 4 plastic “keys” on the outer edge of the foam board strips to create recesses in the mould. Continuing this 2-piece mould later Somchai turned the cast over, removed the clay props and the foam board and keys, and repositioned it in the wooden boards held tightly around the plaster sides with clamps.
The surfaces to receive plaster were coated with 3 coats of soap mix, and allowed to dry. An optional variation was to move one end of the box away from the end of the cylinder by the width of the ruler strips, thus making a void for the plaster to fill. This became the base, attached to the second half of the mould.
A very important tip was to pierce the setting plaster approximately midway with a fine skewer until it hit the master. If the mould proved difficult to separate a blast of air from a compressor through this hole would pop the pieces apart.
In much the same way as the cylindrical mould, the first half of the rectangular mould was completed. The master was surrounded by the cottle boards leaving a ruler-wide gap along one side. The height to which the plaster needed to be poured was marked on the inside.
All plaster and wood surfaces were coated with soap, the volume of plaster calculated, cracks sealed, and plaster poured. When set and removed from the reservoir Somchai scooped out 2 semi-spherical hollows in the mould’s long edges. These would become the locking devices for the 2 piece mould.
To make the second half of the rectangular mould the first piece with master was positioned in the reservoir, leaving a ruler-width gap down the long side AND a ruler width gap at one end.
Soap on all surfaces, gaps plugged, and plaster poured. Again, inserting a thin skewer through the setting plaster to the master, as insurance against the mould not readily falling apart when set.
Somchai alerted us to the fact that some plaster pieces can warp when they dry. So once separated and the master removed, reconnect the pieces and hold together with bands until dry. If separated pieces do warp then soaking in water and clamping together is a solution.
Another version of making a master was demonstrated on the wheel. In a staged process Somchai cast a “blank” in plaster on a batt attached to the wheel-head. When set but still damp he used a long handled turning tool to carve a profile in this plaster blank.
Plaster is a soft material and even when dry can be sawn and drilled easily to make or alter moulds or plaster blanks.
An interesting example of this creativity and spontaneity was demonstrated when Somchai stacked a series of sawn and split sections of plaster to create an ad hoc cast of seeming great complexity.
The stack required no banding prior to pouring the slip as the slip linked all the pieces together on the inside, and gravity kept the pieces in place. (Larger structures may need support, he advised.)
Casting
The moulds need to be completely dry before use. This may take a week or more of air-drying, but assisted drying is possible at low temperatures around 50C.
“Before casting wipe the mould with a damp sponge. This removes dust and any remnant soap or clay, and breaks the dry surface tension, enabling a quick uptake of water from the slip.”
Somchai advised that factory-made casting slip can sometimes be too thick and sometimes too thin. “Adding water to thick slip is easy, but it’s difficult to remove water because the clay is held in suspension. Casting with thin slip can be problematic as it takes longer to build up the wall thickness, saturates the moulds faster, shrinks more, and is more brittle.”
Most multi-piece moulds need tying together. One of the cheapest options is to slice up old tyre tubes. These can be over-stretched (or not) to achieve the required elasticity before using, and cut thick or thin. They can be doubled up for extra tightness, or add a spacer between the band and the mould to take up slack. “It’s wise to overdo the bands as leaking slip is no fun”, cautioned Somchai. “Remember that there is quite some pressure on a mould filled with slip.”
Somchai advised to over estimate the volume of slip required to fill the mould, as it needed to be poured in one steady action. Stopping mid-pour leaves a line in the cast. (But could be used for decorative purposes!)
“Fill the mould to the brim. Many moulds have a “waste rim”, a margin at the top that is not part of the piece. As the mould absorbs water the level of slip will drop and more slip needs to be added at intervals until the required thickness is visable. This can be anywhere from a minute to half an hour!
“The length of time the slip stays in the mould depends upon a few things. How thick you want the piece, the dryness of the mould, and the wetness of the slip.”
When ready the mould was upturned over the bucket to empty the remaining fluid slip, and set to drain at an angle upside down. The angle allows the slip to flow to the exit rather than drooping and setting as a blob on the surface. The mould can remain this way for a few hours until ready for release.
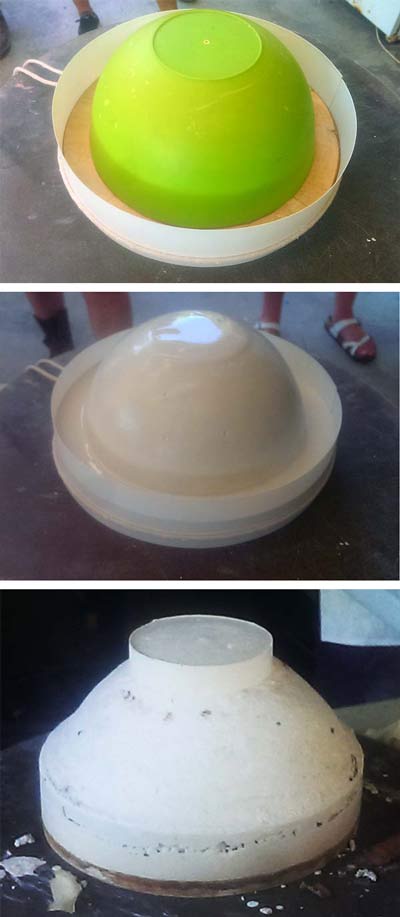
For the final exercise of the day Somchai set up a simple one-piece master (a plastic bowl) to demonstrate the application of paper plaster. Mixing coarse paper pulp (damp) into the plaster/water mixture reduces the weight per volume of the plaster cast, but does not hinder the plaster’s setting capabilities. 1L water 1kg plaster and 300g of paper pulp. Similarly almost any organic material can be used instead of paper, such as straw, mulch, sawdust, etc. Cheap toilet paper (added dry) is also a source of paper and readily available.
Having set up the master with its surrounding reservoir Somchai applied a skim coat of normal plaster mix to capture the surface detail of the bowl.
When set he added the paper plaster mix in the form of a thick slurry, patting it on to cover the skim coat, to a thickness of a few centimetres.
Paper plaster adheres firmly to the other plaster surface and is a useful repair mixture if moulds are chipped or broken.
Lastly he poured a small ‘foot’ and ensured that this was horizontal so that when the mould was used the rim would also be horizontal and contain the slip.
Somchai generously imparted a wealth of essential information, and entertained us with the ups and downs of the casting process. It seems that Murphy’s Law applies here just as much (if not more so) as in all our other clay pursuits.


